Surf the Internet with this Simple Arduino Project for Beginners | Your First ESP8266 IoT Project
 |
| The ESP12E WiFi module |
I'm going to show you how. We used this NodeMCU Single Kit for this tutorial.
First you'll need to understand some basics of how Internet Browsers work. Here's a crash course:
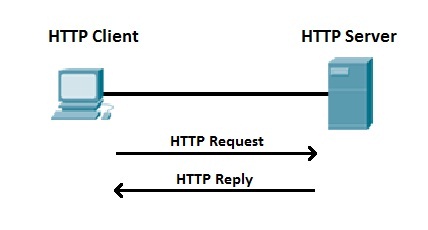
- Browsers use a protocol called HTTP, designed to send and receive Webpages, Hyperlinks and Media over the internet
- They use HTTP functions like 'GET' to request data, and 'POST' to send data
- When you type google.com in your Browser URL Bar, it actually sends a GET request to the 'www.google.com' address. Google then responds with the Website and related media that you see in the Browser.
- So when we surf the internet with the ESP8266, we are basically getting it to send the same 'GET' request to a Web Address of your choice. This could be a Domain Name like 'www.youtube.com' or an IP address like '234.54.23.45'
- Further reading on Wikipedia here
Ok, now you know enough to begin.
I assume that you have the Arduino IDE installed and the ESP8266 libraries and board installed. If not, you can check out our other tutorials.
To get this bot working, follow these steps:
- Open https://github.com/deviceinteractions/tutorial-esp8266-http-client to get the Arduino IDE code for this tutorial
- Click on 'Clone or Download' and select download Zip. (If you are familiar with git, you can just clone it).
Also go through the Readme there. - Once downloaded, open the .ino file in that repository with your Arduino IDE
- Change the WiFi credentials and put in a Web Address of your choice
- Plug in a NodeMCU or any ESP8266 board
- Select the correct board and port from the Arduino IDE Tools Menu
- Open the Serial Monitor and select 9600 baud (bottom right corner)
- Upload this sketch
 |
| Getting the tutorial Code from Github |
 |
| Selecting the right baud rate in the Serial Monitor |
Once it has uploaded, the Serial monitor will display the status and the HTML response received from the target Webpage.
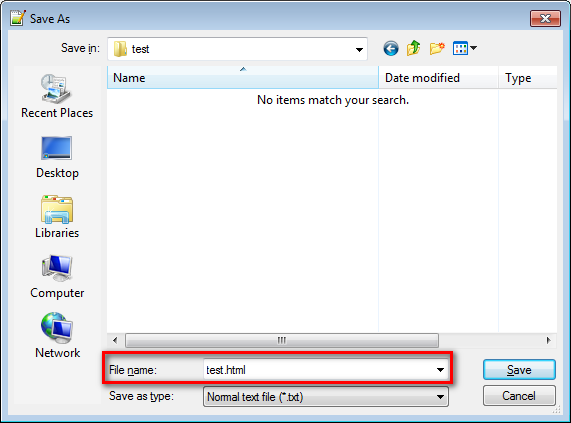
To view the response, follow these steps:
- Copy the response HTML from the Serial Monitor to a notepad window
- Save the file as a *.html file
- Once saved, open that html file with an internet browser like Chrome
- It will display what the received page looks like
 |
| Opening the Serial HTML response with a Browser |
What the code means:
- Initially, the code lets you define some static values, like your WiFi Name (WIFI_SSID), WiFi Password (WIFI_PASS) and the Website that you want to connect to (SERVER_NAME)
- In the setup function, we clear the Serial buffer, making sure that we have maximum memory available for later use
- We then connect to the defined WiFi Network
- In the loop function, we check for a successful WiFi connection and then send a GET Request to the defined Website
- On response, we check whether the connection was successful and start receiving the response body
- The response is stored on a local variable and then Serial-Printed to the PC
- The response HTML of the desired Webpage then appears on the Serial Monitor Window
- This repeats every 10 seconds
To Summarize:
The ESP8266 has the standard internet communication (TCP/IP) protocol support built into it.
To create an IoT project, all you need to do is program it using the Arduino IDE.
Here we got it to work like a Web-Browser, grabbing the webpage based on the URL provided and displaying it as HTML code.
Hope you could get it to surf the internet.
Write to me at interactions@dipune.com or leave a comment here.
Do check out these WiFi development kits that we designed to get IoT developers started instantly with minimum expenditure.
We love ideas! If you have some concepts for an cool and useful Project or Product, we would like to hear about it and even develop it with you.
Follow us on Github, Facebook and Instagram for more such tutorials, content and cool projects!


Hi, I'm currently trying to make a smart house, controlling the lights, doors, room temperature and other things with an arduino from a website, but I haven't been able to make it work. Can you help me please?
ReplyDeleteIt doesn't print the html code for a different webpage, I beleive it is due to the page size, any workaround?
ReplyDeleteYes. In this case the page size exceeds the RAM capacity. It's a hardware constraint. The goal of this example is a simple introduction to HTTP functions. You could try using a ESP32 or a Raspberry Pi Zero if to make a universal internet surfing bot.
Delete